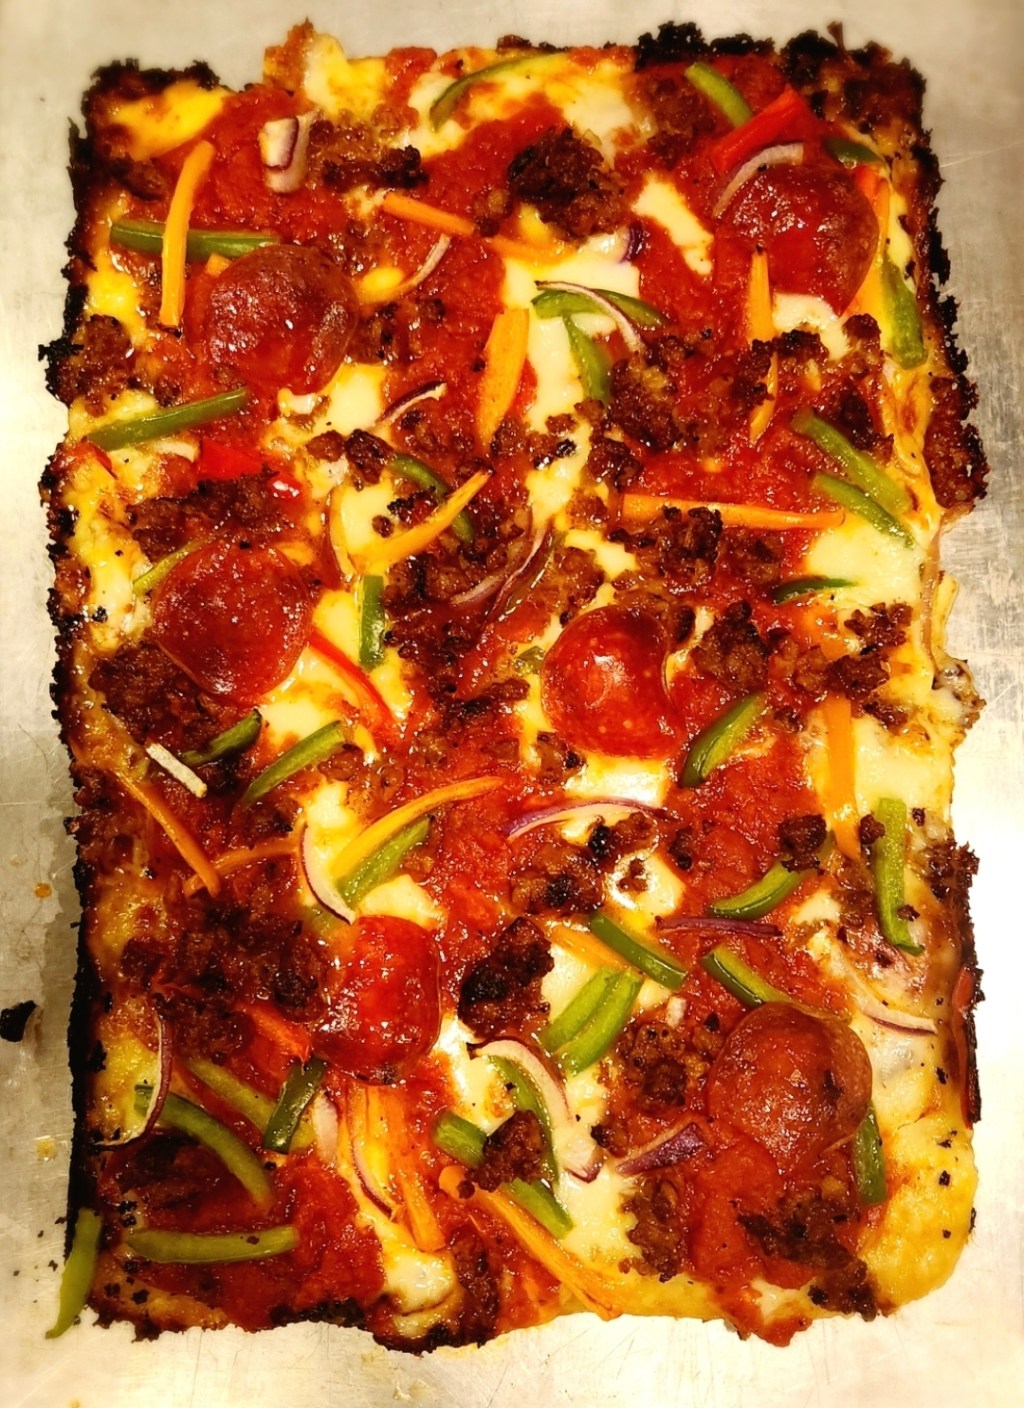
Detroit-Style Pizza
Detroit-style pizza has its roots in Detroit, Michigan, where Gus and Anna
Guerra began serving their square pizza at Buddy’s Rendezvous in 1946.
Traditionally baked in rectangular blue-steel automotive parts pans, the
pizza became known for its thick, airy crust, crispy olive-oil-fried bottom,
caramelized cheese edges, and sauce layered over the cheese rather than
underneath it.
This version takes that Detroit tradition and gives the crust a little
something different: cooked russet potato. Inspired by the tenderness of
focaccia, the potato creates a remarkably soft and airy interior while the
heavily oiled pan and brick mozzarella deliver the crisp bottom and
caramelized cheese edge that make Detroit-style pizza so distinctive.
Detroit-Style Pizza
This recipe is designed to be started in the morning and baked the same
evening. A modified autolyse develops the flour before the potato and
remaining ingredients are incorporated, while the KitchenAid stand mixer
provides the gluten development needed for this high-hydration dough.
Recipe Overview
- Yield: 1 (10 × 14-inch) Detroit-style pizza
- Servings: 3–4
- Start: 10:00 AM
- Par-bake: Approximately 4:45–5:00 PM
- Final bake: 6:00 PM or later
- Difficulty: Moderate
Ingredients
Potato Dough
- 500 g bread flour
- 250 g cooked russet potato, peeled and finely riced
- 350 g water, divided
- 6 g instant yeast
- 10 g kosher salt
- 25 g extra-virgin olive oil
For the Pan
- 45–50 g extra-virgin olive oil
Pizza Toppings
- 325–350 g brick mozzarella, cut into approximately 1/2-inch cubes
- 150–200 g pizza sauce
- 25–30 g freshly grated Parmesan
- Pepperoni or other toppings of choice
- Fresh basil, for finishing
- Extra-virgin olive oil, for finishing
- Freshly ground black pepper, optional
Equipment
- 10 × 14-inch Detroit-style steel pan
- KitchenAid stand mixer with dough hook
- Digital kitchen scale
- Wire cooling rack
- Thin metal spatula
Instructions
1. Prepare the Potato
Cook the russet potato until completely tender. Peel while warm and rice
or mash until completely smooth. Do not add butter, milk, or other
ingredients.
Allow the potato to cool to room temperature before adding it to the dough.
2. Modified Autolyse — 10:00 AM
Add the bread flour and 300 g of the water to the bowl of a stand mixer.
Mix just until all of the flour is hydrated and no dry flour remains.
Cover and let the mixture rest for 30 minutes.
3. Add the Potato and Yeast — 10:30 AM
Add the cooled potato, instant yeast, and the remaining 50 g of water.
Mix until the potato is thoroughly incorporated.
Let the dough rest for 10 minutes.
4. Add Salt and Olive Oil — 10:40 AM
Add the kosher salt and 25 g olive oil.
Fit the KitchenAid with the dough hook. Mix on low speed for 2–3 minutes,
until the ingredients are fully incorporated.
Increase to speed 2 and knead for approximately 5–7 minutes, scraping the
bowl once or twice if necessary.
The dough should become smooth, elastic, and stretchy while remaining
noticeably soft and sticky. Do not add additional flour.
Perform a windowpane test. A small piece of dough should stretch thinly
before tearing. If it tears immediately, knead for another 1–2 minutes.
5. Bulk Fermentation — Approximately 11:00 AM to 2:00 PM
Transfer the dough to a lightly oiled bowl and cover. Allow it to ferment
at approximately 75–78°F until it becomes puffy, bubbly, and roughly
doubles in volume.
The exact timing will depend on the temperature of the room and the activity
of the yeast. Use the appearance of the dough rather than the clock as your
guide.
6. Prepare the Detroit Pan — Approximately 2:00 PM
Pour 45–50 g of olive oil into a 10 × 14-inch Detroit-style pan. Spread the
oil evenly across the entire bottom of the pan.
Transfer the dough to the pan and flip it once so both sides are coated
with oil.
Let the dough rest for 20 minutes.
7. Stretch the Dough
After the 20-minute rest, gently press the dough toward the edges of the
pan using your fingertips.
If the dough has already relaxed completely into all four corners, stop.
Do not continue stretching or degassing it.
Cover the pan and allow the dough to continue its final proof.
8. Final Proof
Allow the dough to become very puffy, bubbly, and visibly aerated. When the
pan is gently shaken, the dough should have a soft, pronounced jiggle.
The dough does not need to double again during the final proof. The goal is
to build volume and preserve the gas developed during fermentation.
Once the dough is puffy and bubbly, do not stretch, punch down, or
aggressively dimple it.
9. Par-Bake the Crust
If the pizza needs to be prepared several hours before the final bake,
par-baking the crust provides the best result.
Preheat the oven to 450°F.
Lightly drizzle the surface of the dough with olive oil. Avoid aggressive
dimpling so the dough retains as much of its fermentation gas as possible.
Bake the naked crust for approximately 7–9 minutes.
The crust should be set and lightly colored but not fully browned or crisp.
Remove the crust from the pan and transfer it to a wire rack to cool
completely. Allowing the steam to escape prevents the bottom from becoming
soggy.
10. Top the Pizza
Once the crust has cooled completely, return it to the pan.
Distribute the brick mozzarella evenly across the crust, making sure to
push cheese all the way against the edges of the pan.
The cheese touching the steel pan will melt and caramelize, creating the
characteristic crispy Detroit-style cheese edge.
Add pepperoni or other toppings.
Spoon the pizza sauce over the cheese in 3–4 stripes running lengthwise
across the pizza.
Finish with freshly grated Parmesan.
If the pizza will not be baked immediately, cover it well and refrigerate
until ready to bake.
11. Final Bake
Preheat the oven to 500°F.
If possible, allow the refrigerated pizza to sit at room temperature for
approximately 20–30 minutes before baking.
Bake for approximately 7–10 minutes, until the cheese is
deeply browned and caramelized around the edges and the center is hot.
If additional browning is desired, move the pizza to a higher rack for the
final 1–2 minutes.
12. Remove From the Pan
Immediately run a thin metal spatula around the perimeter of the pizza.
Work the spatula underneath the corners and carefully remove the pizza
from the pan.
Transfer the pizza to a cutting board or wire rack. Do not allow it to sit
in the hot pan, as trapped steam can soften the crispy bottom.
13. Finish and Serve
Finish with fresh basil, freshly grated Parmesan, a light drizzle of
extra-virgin olive oil, and freshly ground black pepper if desired.
Allow the pizza to rest for approximately 5 minutes before cutting.
Slice into 12–15 rectangular pieces and serve hot.
Chef’s Notes
Why Potato?
The cooked russet potato adds moisture and tenderness to the dough while
helping create a soft, airy interior reminiscent of focaccia.
Why Brick Mozzarella?
Brick mozzarella has the lower moisture and excellent melting characteristics
needed for Detroit-style pizza. When placed against the sides of the pan,
it develops a deeply browned, crisp cheese crust.
Why the Modified Autolyse?
Hydrating the flour before adding the potato allows gluten development to
begin before the dough becomes more complicated by the potato and oil.
This makes the high-hydration dough easier to develop and handle.
Why Use a KitchenAid?
The KitchenAid makes it easier to develop sufficient gluten in this wet,
potato-enriched dough. Knead until the dough becomes elastic rather than
trying to make it completely dry or clean the bowl.
Make-Ahead Option
When the pizza must be prepared several hours before dinner, par-bake the
naked crust, cool it completely, add the toppings, cover, and refrigerate.
Finish the pizza in a 500°F oven shortly before serving.
Key Temperatures
- Bulk fermentation: Approximately 75–78°F
- Par-bake: 450°F
- Final bake: 500°F



Leave a Reply